


The United States Antarctic Program (USAP) primarily exists to support scientific research in Antarctica. In order to provide that support, one of their most important functions is to ensure the safety of all personnel involved in the research. Much of our time at McMurdo has been spent doing trainings to get us oriented to the station, our environment, and the equipment we’ll be using. I’ve had general trainings on operating NSF’s light vehicles, waste management, medical facilities, fire prevention and response, harassment, and environmental protection. I’ve also done field-oriented trainings on understanding the contents of our survival bags (we carry these with us at all times off station or out of camp; they include things like emergency tents and sleeping bags, a stove, fuel, and food), recognizing signs of hypothermia and frostbite, assessing and managing risk, and driving snowmobiles. We also do trainings that are specific to where we’re headed in the field. In our case, that includes crevasse rescue training.
Our team is headed (as soon as we can get out of McMurdo) for two camps in the deep field, both of which are on ice shelves. Ice shelves are the floating extensions of the ice sheet: they’re connected to and flowing with the ice on the continent, but they are also truly floating on the ocean, going up and down with the tides. Since the undersides of ice shelves are sitting in water, there is virtually no friction at their bases slowing them down, so ice tends to speed up when it flows into an ice shelf. Any time ice speeds up, goes around a bend, crosses a big change in elevation, or hits a bump in the bedrock, it tends to crack, forming crevasses. These crevasses can be hundreds of feet deep and are often hidden by a fragile layer of snow known as a “snow bridge,” which can be very difficult to spot. If you unknowingly cross a snow bridge, it may collapse under your weight, dropping you into the crevasse.
We plan to do our best to avoid crevasses in the first place. Our team includes two professional field guides, Cece and Blair, who will scout all our sites and travel routes before we use them for science. That has been done as much as possible already using high-resolution satellite imagery. Once our advance team gets to WAIS Divide, they will go out on one or two reconnaissance (“recce”) flights to inspect our sites from the air. If it’s safe, the pilot will land, and Cece, Blair, and our team member Martin will run radar to double-check that there aren’t bottom crevasses in our camp location that could disrupt the drilling operations. Once the team gets to the field, Cece and Blair will travel the routes we plan to take and use flags to mark areas that are safe and indicate hazards to avoid.
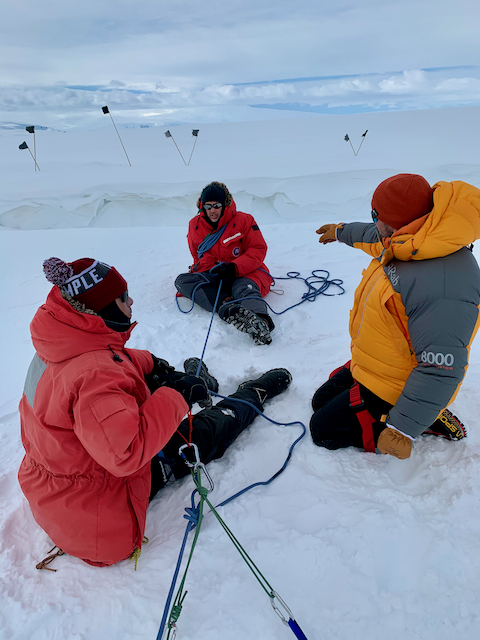
Proving routes in this way is incredibly valuable and raises our margin of safety greatly, but we will be in a rapidly changing environment, and new crevasses can open or be uncovered during our time in the field. We will ensure that our campsite is in a spot that is really, really safe, so there’s no problem walking around there without extra precautions. Anytime we move outside of camp, however, we will used roped travel, whether that’s on a snowmobile, on foot, or by ski. In this system, everyone wears climbing harnesses, and attaches their harnesses to knots in a long rope connecting the party. Each member of the team is spaced out a good ways – our foot/ski ropes will have a 15-meter spacing between people, and the snowmobile rope teams will have a longer spacing. The idea is that if someone breaks through a snow bridge, the other people on the team will be able to catch them on the rope. When we did our crevasse rescue training in the field last week, part of what we did was learn how to properly lay out ropes for travel, tie the right knots, and clip in securely.

Blair sets up knots in one of the ropes that we will use in the field for roped snowmobile travel
Once a person falls into a crevasse and is caught by the rope, there are lots of options for getting that person out. Assuming the person is conscious and can communicate, the team can start by just trying to walk away from the crevasse and haul them out. It’s really important to communicate, however, because sometimes crevasses have overhangs that the person can get crushed under as the team hauls them out. If the person can’t communicate (perhaps they’re just too far away to hear), or if the team isn’t strong enough or the footing not solid enough to haul the person out by walking, there are a bunch of options.
First, the person in the crevasse will be connected to the rope with two smaller looped cords, attached with a knot called a Prusik hitch. This hitch can slide up the rope easily when not under tension, but holds tight when weighted. One of those Prusiks is attached to the waist of the harness, and the other is attached beneath it and has another loop tied in it that goes around the foot. If the person in the crevasse is able, they will stand up on the foot Prusik and move the waist Prusik up the rope. Then they put their weight on the waist Prusik and move the foot Prusik up, continuing that way until they can wriggle up over the edge of the crevasse.

Me practicing using Prusik hitches to move up and down a rope during our indoor rope training, while field guide Blair watches and gives me instructions
If the person in the crevasse is unconscious or unable to move up the rope on their own, the team up above needs to set up a pulley system to get them to the top. The first thing that has to be done is to make it so the team isn’t having to use their weight to keep the person in the crevasse from falling. This involves digging a snow anchor, in which some sort of stable object, such as a shovel, ice axe, or a piece of metal that has been designed to be a strong snow anchor, is buried a foot or two deep in the snow and rigged so it can be attached to the climbing rope that the person in the crevasse is on. Once the snow anchor has the person’s weight, the rest of the rope team have more freedom to move around to build a pulley system, get another team member down into the crevasse to help the person if necessary, lower another rope to the person in the crevasse, etc. Exactly which technique is used depends strongly on the individual situation. Fortunately, either Cece or Blair will be with every team working outside of camp, so they will be there to make technical decisions and give directions if a crevasse rescue is necessary.
Blair (right) helps Atsu and Doug rig a pulley system that can be used to get a teammate out of a crevasse
These techniques were all brand new to me. We practiced much of the rope work indoors first (I arrived in McMurdo at 3:30 in the morning and indoor rope training started that day at 8 am. I was a bit late, but I did make it!). The day after our indoor training, we spent the whole day out on the ice shelf where a bulldozer had been used to dig a large simulated crevasse. It was really valuable to practice the same skills we learned indoors in an outdoor setting – everything gets harder when you’re wearing gloves and your rope is digging into the snow.
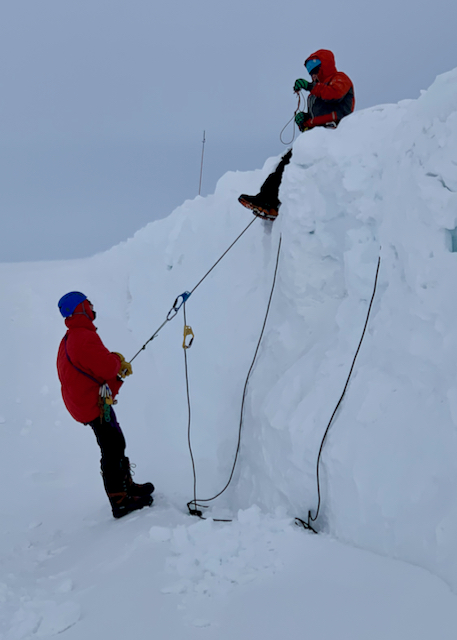
Cece (top) helps Ted with some advanced crevasse rescue techniques in the bulldozed “crevasse”
We don’t expect to need any of our crevasse rescue skills; we intend to avoid crevasses in the first place. But we also need to be prepared in case we need to act in an emergency situation!